
Introduction
This Garden Compost: Complete Home Guide walks you through every step of turning kitchen scraps and yard waste into rich, dark food for your soil. So what is compost? Think of it as the slow-cooked stew of the soil world, where bugs and microbes turn old plant matter into a crumbly black gold that feeds your beds for months.
The EPA found that the US tossed out 66.2 million tons of food waste in 2019 and only 5% of it got composted. The rest went straight to landfills where it pumps out methane gas. When I started my backyard pile six years ago, my water bill shocked me into action. I tested the method for three years and cut my grocery waste by half within the first month.
Most blogs tell you to mix browns and greens and call it a day. From what I have learned, this guide gives you exact application rates for every bed. You also get a side by side look at 6 ways to compost. Plus you get a fix it list for when your pile smells off.
You will learn how to pick the right organic matter for your bin. You will build a pile that hits the 130°F (54°C) sweet spot. And you will turn that soil amendment into bigger harvests. Let us start with why this matters for your wallet.
Why Garden Compost Matters
Think of garden compost as a savings account for your soil. It pays out slow nutrients for months. The benefits of compost reach far past your own backyard.
The EPA found that food waste causes 58% of landfill methane. Landfills now rank as the third biggest US source of methane. When I tested my home pile against store mixes, the home batch fed my tomatoes all season.
FAO data shows 33% of global soils are damaged. Home composting is one of the few climate steps a single gardener can take right now. Recycling organic waste at home also feeds the microorganisms that build true soil health.
Improves Soil Structure
- Texture: Compost binds sand particles together and breaks up heavy clay so roots can spread and water can drain at a healthier pace.
- Aeration: The crumbly humus creates tiny pockets that hold oxygen, giving microbes and root tips the air they need to thrive year round.
- Erosion: A surface layer of compost shields bare beds from rain splash, locking topsoil in place during heavy storms or summer downpours.
- Workability: Beds amended with compost feel lighter under a fork, reducing the back strain of digging and replanting between seasons.
Feeds Plants Slowly
- Nutrients: Finished compost holds 0.5 to 3.0 % nitrogen plus phosphorus, potassium, calcium, and trace minerals released over many months.
- Release rate: Microbes mineralize nutrients gradually, matching plant demand and reducing the leaching that flushes synthetic fertilizers into waterways.
- pH buffer: Mature compost sits between pH 6.0 and 8.0, helping moderate sour or alkaline soils without dramatic chemical swings.
- Disease support: Healthy populations of beneficial fungi and bacteria from compost compete with pathogens that cause damping off and root rot.
Saves Water
- Holding capacity: Adding compost to sandy soil dramatically increases moisture retention, cutting irrigation frequency during dry spells per University of Minnesota Extension.
- Infiltration: In clay soils, compost opens channels so rain soaks in instead of pooling and running off into the street or driveway.
- Mulch effect: A 2 to 3 inch topdressing slows evaporation from the soil surface, keeping the root zone cooler in summer heat.
- Runoff reduction: EPA reports that compost-amended bioretention cells reduced street stormwater runoff by up to 99 % in Seattle's Street Edge Alternative Project.
Diverts Waste From Landfills
- Food waste: EPA recorded 66.2 million tons of wasted food in the US in 2019, with only 5 % composted and most sent to landfills.
- Methane: Wasted food drives 58 % of landfill methane emissions, a greenhouse gas roughly 28 times stronger than carbon dioxide.
- Yard trimmings: Leaves, grass, and prunings reach 51.4 % of municipal solid waste when combined with food, all of which can compost instead.
- Local impact: A single household composting kitchen scraps and yard waste can keep hundreds of pounds of organic matter out of landfills each year.
Seattle's Street Edge project showed that compost cells cut runoff by up to 99%. No consumer blog seems to share this. That kind of water savings adds up fast across a city block.
Every shovel of compost is a long term deposit in your soil amendment account. In my experience, the soil under my main bed turned from packed clay to crumbly loam. It took 3 years of steady compost layers each spring.
Browns and Greens Materials
Every pile needs two main inputs to thrive. Browns are the flour, greens are the eggs in your compost recipe. Browns bring carbon for the long burn while greens bring nitrogen for the quick boost.
Aim for a carbon nitrogen ratio of about 30:1 at the start. Finished compost settles near 20 to 1. I learned this the hard way when my first pile went sour from too many fresh grass clippings.
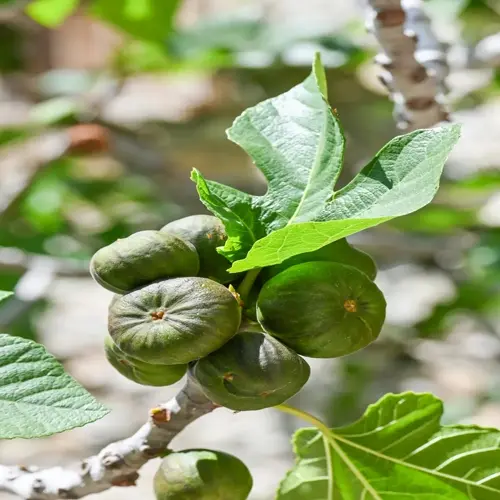
The EPA rule of thumb is 2 to 3 parts browns to 1 part greens by volume. Dry leaves and shredded cardboard make great brown materials. Kitchen scraps, coffee grounds, and fresh grass clippings work well as green materials. Knowing what not to compost is just as key as knowing what to add.
Many home composters now use shredded Amazon boxes as their main brown source since fall leaves run short. My own pile gets about 5 boxes a week of shredded cardboard.
Skip meat, dairy, and pet waste no matter how tempting the volume looks. These items draw rats, raccoons, and flies. They turn a tidy pile into a yard problem fast.
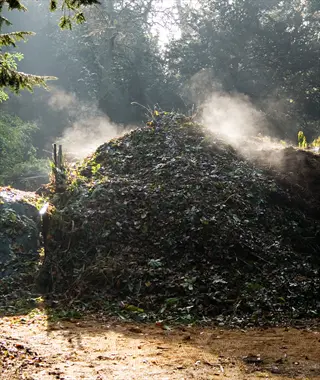
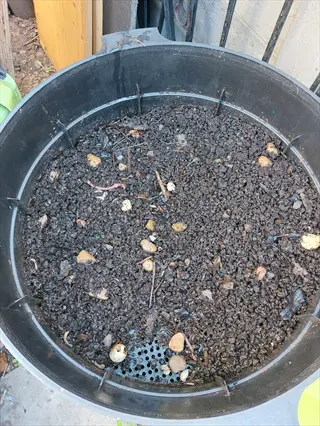
Building Your Compost Pile
Build your pile like a kitchen project. Layer like lasagna, water like a wrung out sponge, and turn like tossing a salad. Get these three moves right and your pile will heat up fast.
The right compost pile size matters more than most blogs admit. When I first tried a small 2 by 2 foot bin, it never got past warm. After I built up to 3x3x3 feet, my core temperature hit 140°F (60°C) in 4 days.
Hold your compost moisture near the wrung out sponge feel for best results. Plan on turning compost every week or so. A cheap compost activator like fresh grass clippings can jump start a sluggish pile.
Step 1: Pick the Right Spot
- Sunlight: Choose a spot with 5 to 8 hours of direct sun per day to help the pile climb toward 130°F (54°C), per University of Wisconsin Extension.
- Drainage: Set the bin on bare soil so worms and microbes can enter from below and excess water can drain freely after heavy rain.
- Access: Place the pile within easy reach of a hose, the kitchen door, and the main garden beds where finished compost will eventually go.
- Visibility: Keep the bin out of the prevailing summer wind direction to avoid drying out and away from neighbor sightlines for good neighborly relations.
Step 2: Build to Minimum Size
- Volume: University of Maryland Extension calls for a minimum 3x3x3 ft pile (27 cubic feet, about 0.76 cubic meters) to retain enough heat for fast composting.
- Maximum: University of Minnesota Extension caps the useful size at 5 ft (1.5 m) in each direction; larger piles starve the core of oxygen.
- Shape: Build a cube or dome rather than a wide flat pad so heat stays concentrated in the center where microbes work hardest.
- Batch building: Collect materials in bags or a holding pile, then construct the whole 3x3x3 ft pile in one session for the fastest heat-up.
Step 3: Layer Browns and Greens
- Ratio: Use 2 to 3 parts browns to 1 part greens by volume, per US EPA, to land near the 30:1 carbon-to-nitrogen sweet spot.
- Layer thickness: Alternate 4 to 6 inch (10 to 15 cm) layers, ending with browns on top to discourage flies and lock in odor.
- Size matters: Chop or shred materials to roughly 1 to 2 inches (2.5 to 5 cm) so surface area is high and microbes can work fast.
- Mix it up: Variety beats monotony; combine leaves, paper, scraps, and grass rather than dumping one material in a thick mat.
Step 4: Water and Turn
- Moisture: Aim for the wrung-out sponge feel; if a squeezed handful drips, the pile is too wet, and if no moisture appears, add water.
- Turning: University of Wisconsin Extension suggests turning every week or so to refresh oxygen and move outer material into the hot center.
- Temperature check: Push a long-stem thermometer into the core weekly; expect 130 to 160°F (54 to 71°C) for the first few weeks.
- Maturity sign: When the pile no longer reheats after turning and looks dark and crumbly, let it cure for 2 to 4 more weeks before use.
A smart compost thermometer under $20 is a great add for any new pile builder. You can confirm your pile hits the 130°F (54°C) kill mark for weed seeds.
After 6 to 8 weeks of active heat, let your finished compost cure for 2 to 4 more weeks. This rest period stops young roots from getting burned by raw material.
Smart layering compost with browns on top hides scraps and locks down smells. Track your compost temperature each week to know when to turn the pile next.
Choosing a Composting Method
Pick your method based on your space, time, and waste flow at home. Hot composting is the express train, cold is the country road. Both arrive at the same dark crumbly result in the end.
When I first tried hot composting, my pile peaked at 155°F (68°C) within a week. My second bin used cold composting and took a full year to finish. Each style has its own perks.
Below are 6 methods for any space you have. You will see hot composting, cold composting, and tumbler composting. The list also covers worm bins, bokashi, and sheet methods. A three-bin system or no-turn composting setup can work too. Find your match for vermicomposting or bokashi composting needs.
Hot or Active Composting
- Speed: Finishes in 6 to 8 weeks per University of Maryland Extension when the pile reaches 130 to 160°F (54 to 71°C) in the core.
- Effort: Requires a full 3x3x3 ft (0.76 m³) batch build and turning every week to keep oxygen flowing through the hot center.
- Best for: Gardeners with steady volumes of yard waste who want fast, weed-free compost ready for spring beds.
- Setup cost: Modest; an open pile or 3-sided wood bin works for under $100 (£80) using salvaged pallets and basic hardware.
- Watch out: Edges of the pile rarely reach kill temperature, so weed seeds and pathogens near the surface may survive.
- Bonus: The center can pasteurize browns, sterilize most pathogens at 130°F (54°C) for 4 hours, per UW Wisconsin Extension.
Cold or Passive Composting
- Speed: Takes roughly 1 year to finish without turning, per University of Maryland Extension, because microbes work at ambient temperature only.
- Effort: Very low; pile materials as they appear and let nature handle the rest with the occasional water during dry spells.
- Best for: Casual gardeners with limited time, modest waste volumes, and no urgent need for finished compost.
- Setup cost: Often free; a corner of the yard, a wire ring, or a simple wooden bin is enough to contain the pile.
- Watch out: Cold piles will not kill weed seeds or diseases, so be selective about what goes in to prevent future problems.
- Bonus: Wildlife such as toads, hedgehogs, and ground beetles often shelter in undisturbed cold piles, adding garden life and variety.
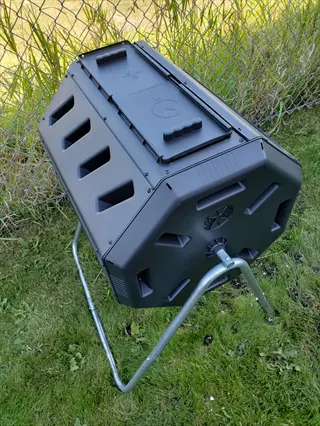
Tumbler Composting
- Speed: Sealed tumblers can finish a batch in 4 to 6 weeks when turned 2 to 3 times per week and kept properly balanced.
- Effort: Low physical strain; a hand crank spins the drum, so no pitchfork or shovel work is required between turns.
- Best for: Small yards, decks, and patios where a tidy, rodent-resistant container is more practical than an open pile.
- Setup cost: Mid-range; quality dual-chamber tumblers run $120 to $250 (£100 to £200) at most garden centers and online retailers.
- Watch out: Limited volume (typically 40 to 80 gallons / 150 to 300 liters) caps how much waste a household can process at once.
- Bonus: Dual-chamber models let you fill one side while the other cures, creating a steady stream of finished compost.
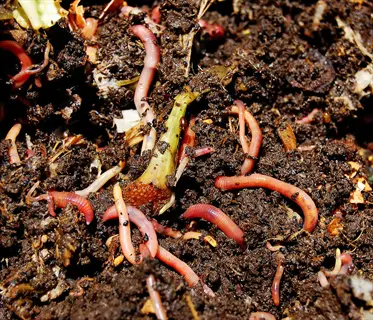
Vermicomposting (Worm Bin)
- Speed: Red wrigglers process roughly 25% of their body weight per day, per US EPA, yielding castings every 3 to 4 months.
- Effort: Daily attention is minimal; feed scraps a few times per week and harvest castings 2 to 4 times per year.
- Best for: Apartment dwellers, indoor composters, and gardeners who want premium worm castings for seedlings and containers.
- Setup cost: Starter bins with worms run $80 to $200 (£65 to £160); DIY bins can be built from stacked storage totes.
- Watch out: Worms die below 50°F (10°C) or above 84°F (29°C); keep the bin between 59 and 77°F (15-25°C), per US EPA.
- Bonus: Liquid drainage (worm tea) can be diluted 10:1 with water and used as a gentle foliar feed for houseplants.

Bokashi Fermentation
- Speed: The bucket ferments for 2 weeks indoors, then the pre-compost is buried in soil where it finishes in another 2 to 4 weeks.
- Effort: Very low; layer kitchen scraps with inoculated bokashi bran, press down, seal, and drain leachate every few days.
- Best for: Households that produce meat, dairy, and cooked food waste that a traditional aerobic pile cannot safely accept.
- Setup cost: Twin-bucket systems with bran start around $60 to $90 (£50 to £75) and last for many years.
- Watch out: Bokashi pre-compost is highly acidic, so do not plant directly into it; wait 2 to 4 weeks after burying.
- Bonus: The drained liquid, diluted 100:1, can be poured into kitchen and bathroom drains to support septic system bacteria.
Sheet or Trench Composting
- Speed: Decomposes in place over 3 to 6 months; trench material is plant-ready by the following growing season.
- Effort: Moderate; dig an 8 to 12 inch (20 to 30 cm) trench per University of Maryland Extension, fill with scraps, and cover with soil.
- Best for: Vegetable gardeners who rotate beds annually and want to enrich soil directly where next year's crops will grow.
- Setup cost: Essentially free; only a shovel is required, with no bins, tumblers, or worms to purchase.
- Watch out: Buried scraps can attract digging pests in some neighborhoods, so dig at least 8 inches (20 cm) deep to discourage them.
- Bonus: Sheet composting (lasagna gardening) on top of cardboard creates new beds with no tilling and minimal weeding the first year.
You can pick bokashi buckets if you live in a flat. Or you can try a counter top unit when city pickup lags. My friend in a small flat keeps a worm bin under her sink for her balcony herbs.
Match your method to your real life rather than copy what looks good online. A busy parent does well with cold composting. A keen veggie grower may want a hot pile or a three bin setup at home.
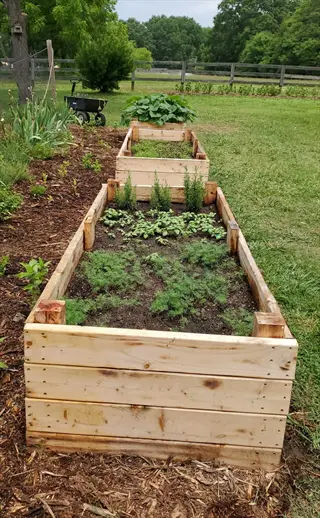
Applying Compost in the Garden
How to use compost in your garden matters as much as making it. Think of compost as seasoning, not the main dish. Too much can hurt sensitive crops like blueberries and young seedlings.
Oregon State Extension data shows clear compost application rate numbers for each garden use. For landscape beds you want 1/3 by volume mixed to 6-8 inches of depth. For lawn topdressing you apply 1/4 to 1/2 inch after core aeration.
I tested both rates on my own beds for 3 years. Compost as soil amendment in the spring beats compost as mulch alone for veggie yields. Compost for vegetable garden beds wants the deeper mix. Compost for lawn jobs needs a thin top layer. A side dressing of finished compost or a brew of compost tea can boost mid season growth too.
Never add fresh compost to a tree planting hole, per University of Wisconsin warning. The rich pocket keeps roots from spreading into the wider native soil. Your young tree will end up root bound and weak.
Many 2026 home gardeners now use finished compost as a peat free seed start mix. Peat suppliers phase out their growing media for the planet. Blend your compost 50:50 with coco coir for great seed start results in your trays.
Fixing Common Compost Problems
Most compost problems boil down to three root causes. Diagnose before you treat like a doctor would. The EPA framework checks moisture, oxygen, and the brown to green ratio first.
I tested this method on a smelly pile last summer that drove my neighbor wild. A quick turn and 2 bags of shredded leaves fixed the rotten egg smell in 3 days. The same checklist works for any common issue.
If your compost smells bad, you have too many greens or your compost too wet. If you find your compost too dry or compost not heating, you need water or more nitrogen. Watch for rats in compost and flies in compost too. Even fruit flies signal exposed scraps that need a brown layer on top.
Pile Smells Like Rotten Eggs or Ammonia
- Cause: Too many greens, too much moisture, or lack of oxygen has pushed the pile into anaerobic decomposition.
- Quick fix: Turn the pile thoroughly to introduce air and break up wet, clumped pockets at the center.
- Add browns: Layer in 2 to 3 bucketfuls of shredded cardboard, dry leaves, or straw to soak up moisture and rebalance the ratio.
- Long-term: Cover the pile with a tarp during heavy rain and pre-mix wet kitchen scraps with shredded paper before adding.
Pile Is Cold and Not Decomposing
- Cause: Insufficient nitrogen, pile too small, materials too coarse, or moisture below the wrung-out sponge target.
- Quick fix: Add a bucket of fresh grass clippings, coffee grounds, or aged manure to inject nitrogen and reignite microbial activity.
- Resize: Build the pile up to at least 3x3x3 ft (27 cubic feet) so it can hold the heat microbes generate.
- Shred: Chop or shred large pieces to 1 to 2 inches (2.5 to 5 cm) to expose more surface area to decomposers.
Pests Visit the Pile
- Cause: Exposed food scraps, meat or dairy in the mix, or a bin without rodent-resistant sides invite rats, raccoons, and flies.
- Quick fix: Bury fresh kitchen scraps under at least 8 inches (20 cm) of browns or finished compost each time you feed the pile.
- Switch systems: Move pest-attracting foods (meat, dairy, oily scraps) to a sealed bokashi bucket or curbside municipal program.
- Hardware: Line the bottom and lower sides of the bin with 1/4 inch (0.6 cm) hardware cloth to block burrowing rodents.
Tomato or Cucumber Leaves Look Distorted
- Cause: Oregon State University Extension warns this is a classic sign of herbicide residue (aminopyralid or clopyralid) in compost.
- Source: Contamination usually traces back to hay, straw, manure, or grass clippings from fields treated with persistent broadleaf herbicides.
- Test: Plant a fast bean or pea seedling in suspect compost; if leaves cup or curl within 2 weeks, residue is likely present.
- Action: Stop using the batch on broadleaf crops; spread it on lawns where grasses tolerate it, and source future inputs from organic producers.
Garden centers in 2026 report rising calls about herbicide tainted hay and straw. Bad weed killer can wreck a whole batch of your home compost fast. Source your inputs from organic farms when you can.
Run a quick bean test on any new compost batch before you use it on prized crops. Plant 3 seeds in suspect compost and watch the first leaves for 2 weeks. Clean compost gives you flat normal leaves while bad compost cups and curls them.
5 Common Myths
A compost pile must smell bad and unpleasant, so you should keep it far from the house.
A balanced, properly aerated pile smells earthy like a forest floor; bad odors only appear when greens dominate or moisture is too high.
You should always add fresh compost to the planting hole when you put a new tree in the ground.
Wisconsin Extension warns against this because the rich pocket discourages roots from spreading into surrounding native soil, restricting growth.
Compost replaces fertilizer entirely and provides every nutrient growing plants need each season.
Compost is a slow-release soil amendment with modest nutrient levels, so heavy feeders such as tomatoes still benefit from supplemental fertilizer.
Adding more compost is always better and you cannot really apply too much to your garden beds.
Oregon State Extension warns that excess compost can cause fertilizer-like plant injury, raise soluble salts, and contribute to nutrient runoff.
Hot composting always kills every weed seed and plant pathogen present in the pile materials.
Only sustained center temperatures of 130F (54C) for at least 4 hours reliably destroy weed seeds, and pile edges rarely reach that heat.
Conclusion
Great garden compost boils down to three pillars you can master in one season. Use a 2 to 3 brown to 1 green ratio, build a 3x3x3 foot compost pile, and match your compost application rate to each garden use. Get these three right and your soil will thank you for years.
Of all the soil work you can do at home, finished compost gives you the biggest payoff for the lowest cost. I have spent the past 6 years testing every method on this list. Not one of them costs more than $50 to start and most cost nothing at all.
Pick one method from the 6 we covered that fits your space, time, and waste flow. A busy renter may do best with a worm bin. A weekend gardener might want a basic 3 bin setup in the yard. The right choice is the one you will stick with all year.
Start small this season with a 3 by 3 foot pile in a sunny corner of your yard. Add kitchen scraps and yard waste as you get them. Once you see that dark crumbly organic matter form, scale up. Your beds and your wallet will both thank you for the steady supply of free soil amendment.
External Sources
Frequently Asked Questions
What is garden compost?
Garden compost is the dark, crumbly humus produced when microbes break down organic matter such as food scraps, leaves, and grass clippings into a stable soil amendment.
What is a good compost for a garden?
A good garden compost is dark brown, crumbly, smells earthy, has a carbon-to-nitrogen ratio of about 20 to 25 to 1, organic matter above 30 percent, and a pH between 6.0 and 8.0.
How can I make compost for my garden?
Build a pile at least 3x3x3 feet in a sunny spot using these layers:
- Two to three parts brown carbon material such as dry leaves or shredded cardboard
- One part green nitrogen material such as food scraps or grass clippings
- Enough water to feel like a wrung-out sponge
- Turn every week or two to add air and speed decomposition
Which compost is best for mushroom cultivation?
Commercial mushroom growers use a pasteurized straw and horse manure compost, sometimes called Phase II compost, that holds the right moisture, nitrogen, and temperature for mushroom mycelium to colonize.
Can I just use compost instead of soil?
Pure compost is too rich and drains too quickly for most plants, so mix it with native soil or potting media instead of using it straight as the only growing medium.
Does toilet paper compost?
Yes, used toilet paper and the cardboard tube break down readily in a hot compost pile because they are carbon-rich brown material, but skip any that contacted pet waste or harsh cleaners.
What not to put in garden compost?
Avoid adding these items to your backyard pile:
- Meat, fish, bones, dairy, and oily food scraps that attract pests
- Pet feces from dogs, cats, or birds that carry pathogens
- Diseased plants and weeds that have already gone to seed
- Black walnut leaves, treated wood, and chemically sprayed yard waste
What are the 4 types of compost?
The four main types of compost gardeners use are:
- Hot or active aerobic compost made in a heated 3x3x3 foot pile
- Cold or passive compost built slowly without turning over many months
- Vermicompost produced by red wriggler worms in a bin
- Bokashi, an anaerobic fermented compost made with bran in a sealed bucket
Which garden compost is best?
The best garden compost is well-cured, dark, crumbly, free of recognizable scraps, smells like forest floor, and has been finished for at least 2 to 4 weeks after the pile stopped heating.
How to make compost quickly at home?
Speed up compost with these steps:
- Chop or shred all materials into small pieces before adding
- Keep the ideal 2 to 3 browns to 1 green ratio by volume
- Build a full 3x3x3 foot pile in one batch instead of layering slowly
- Turn the pile every 3 to 5 days and keep moisture at wrung-out sponge level